How to Lower pH in Pool: Step-by-Step Process & Guidelines
Maintaining the right pool pH level in your swimming pool is one of the most important aspects of pool maintenance. The pH scale measures how acidic or basic your pool water is, with the ideal range being between 7.2 and 7.6. When pool pH rises above this range, it can cause several problems for both swimmers and pool equipment. High pH can be lowered using pH decreaser (sodium bisulfate) or muriatic acid. Test your pool water first, then add the appropriate amount of pH-lowering chemical based on your pool size and current pH level.
Lowering pH: A Brief Guide
High pH levels can lead to scaling on pool surfaces and equipment, reduced chlorine effectiveness, and skin irritation for swimmers. It can also cause cloudy water and create an environment where algae is more likely to grow. Additionally, high pH can cause premature aging of your pool surface and clog filters with mineral deposits. Testing your pool’s pH regularly and taking quick action when levels are high will help you maintain a clean, comfortable, and safe swimming environment while protecting your pool investment.
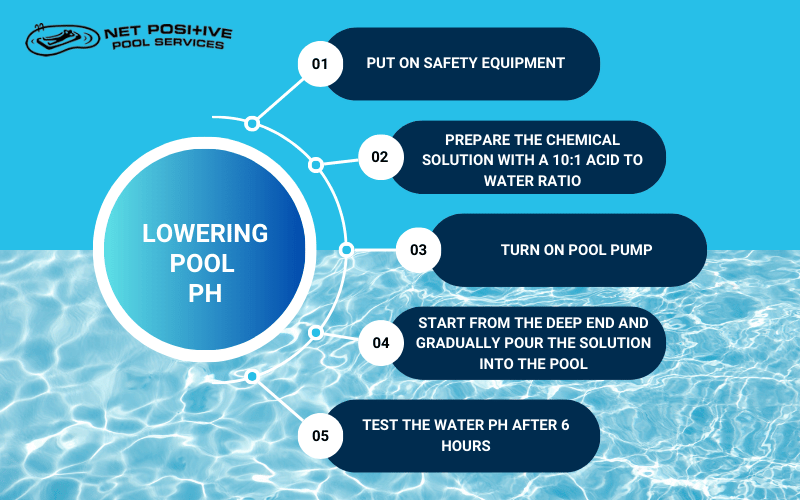
To safely lower the pH in your pool, follow these five essential steps—each designed to protect both your water quality and your personal safety. The infographic below offers a quick visual guide, but here’s a breakdown of each step:
- Step 1: Put on Safety Equipment
Before handling any pool chemicals, wear protective goggles, acid-resistant gloves, and closed-toe shoes to avoid injury from splashes.
- Step 2: Prepare the Chemical Solution
Mix acid with water using a 10:1 water-to-acid ratio in a plastic bucket. Always add acid to water—never the other way around.
- Step 3: Turn on the Pool Pump
Make sure your pump is running before and during the process. This helps circulate the chemicals evenly across the entire pool.
- Step 4: Apply the Solution Carefully
Start at the deep end and slowly walk around the pool’s edge as you pour the diluted solution. This ensures even pH distribution.
- Step 5: Test the Water After 6 Hours
Let the pump run continuously for at least 6 hours, then retest the pH level to see if further adjustments are needed.
These simple steps help you lower your pool’s pH safely and effectively—without risking damage to your pool or equipment.
Understanding Pool pH Basics
Maintaining proper pH levels in your swimming pool is one of the most crucial aspects of pool maintenance. While many pool owners focus primarily on chlorine levels, understanding and managing pH balance can make the difference between crystal-clear water and a problematic pool that’s uncomfortable to swim in.
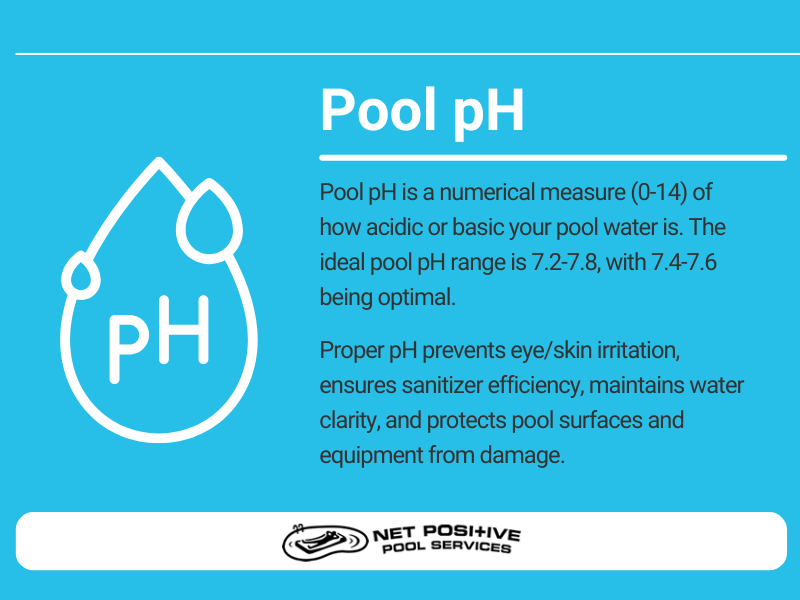
What is pH?
Pool pH is a measurement of how acidic or basic your pool water is, measured on a scale from 0 to 14. A pH of 7.0 is neutral, while readings below 7.0 are acidic, and those above 7.0 are basic (also called alkaline). For swimming pools, the ideal pH level range is between 7.2 and 7.6.
Effects of High pH
When a pool’s pH rises above 7.6, several problems can develop. Swimmers may experience stinging eyes, dry and itchy skin, and brittle hair. The high pH environment also encourages calcium scale formation on pool surfaces, equipment, and plumbing. This scaling can damage pool heaters, clog filters, and create rough spots on pool walls.
High pH significantly reduces the effectiveness of chlorine sanitizer. Even with normal chemical levels, your pool may develop algae or cloudy water because the chlorine isn’t working as well as it should. This means you’ll need to use more pool chemicals to maintain proper sanitation, leading to higher maintenance costs.
Common Causes
Several factors can drive up your pool’s pH levels. Natural rainwater, which tends to be slightly basic in most areas, can raise pH over time. The introduction of municipal tap water during routine pool filling often increases pH since many water treatment facilities intentionally keep pH levels high to prevent pipe corrosion.
Other common causes include regular use of chlorine tablets, which have a high pH, and environmental factors like leaves and debris that decompose in the water. Even normal pool use contributes to rising pH levels, as body oils, sunscreen, and other contaminants affect water chemistry.
Testing and Preparation
Before starting the pH-lowering process, gather these supplies for safe and accurate pool maintenance:
- Essential Testing Equipment:
-
-
- A comprehensive pool water testing kit that measures pH level
-
- Safety Equipment Required:
-
-
- Chemical-resistant gloves
- Protective equipment (eyewear)
- Proper chemical storage containers
-
- pH Lowering Chemicals:
-
- Sodium bisulfate (dry acid)
- Muriatic acid (hydrochloric acid)
Pool Water Testing Guide
Step 1: Collect Your Water Sample
- Gather water from 18 inches below the surface, away from jets and skimmers for an accurate sample.
- Use a clean container that’s free from soap residue or chemicals that could affect your results.
- Fill the container completely underwater to prevent air bubbles from influencing your measurements.
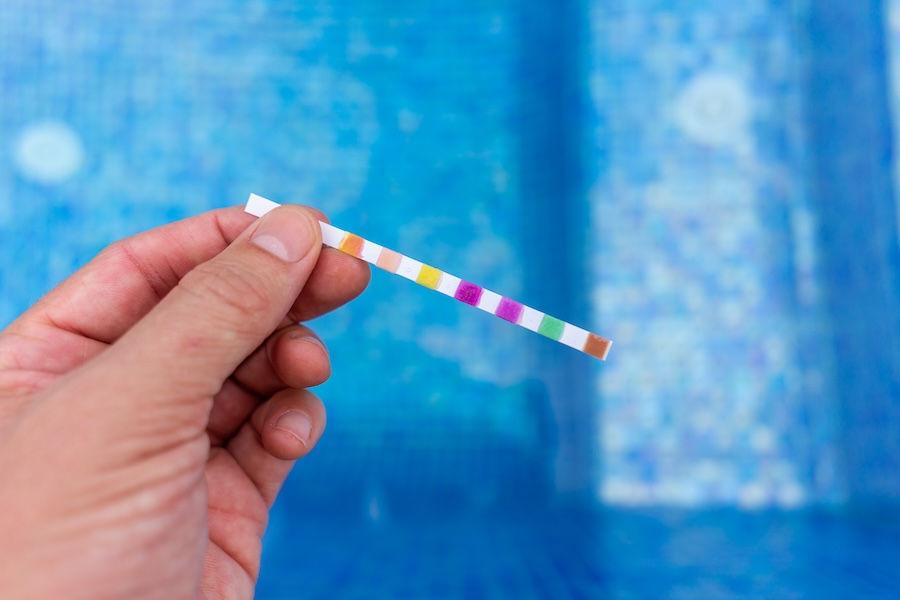
Step 2: Test Strip Method (Option 1 )
- Remove a test strip with dry fingers to avoid contaminating the test pads.
- Dip the strip briefly into your water sample for only 1-5 seconds, depending on your test strip’s brand, to prevent reagent dissolution.
- Hold the strip perfectly level during the development time to keep reagents from mixing between pads.
- Compare the developed colors to the reference chart immediately before they begin to fade.
Step 2: Liquid Test Kit Method (Option 2)
- Fill each test chamber precisely to the marked line, viewing at eye level for accuracy.
- Add the exact number of specified reagent drops while holding the bottle vertically for consistent drop size.
- Mix the solution thoroughly according to instructions until all reagents are completely dissolved.
- Wait the full development time specified for each test to allow chemical reactions to complete.
- Match the final colors to the reference chart in good lighting for the most accurate readings.
Step 3: Document Your Findings
- Record all your test results immediately to ensure accuracy in your records.
- Include the date, time, and weather conditions, which can all affect water chemistry.
- Document every chemical level with its specific numerical value for precision.
- Maintain a consistent log of all readings to track patterns and treatment effectiveness over time.
Pool Volume Calculation
Step 1: Measure Pool Dimensions
- Measure length in feet
- Measure width in feet
- Calculate average depth in feet
Step 2: Calculate Volume for Different Pool Shapes
For Rectangular Pools:
- Multiply length × width × average depth
- Multiply result by 7.5
- Final number = volume in gallons
For Oval Pools:
- Multiply length × width × average depth
- Multiply result by 7.5
- Multiply final result by 0.85
- Final number = volume in gallons
Step 3: Use Volume for Chemical Dosing
- Record calculated volume
- Reference chemical instructions for proper dosing
- Start with minimum recommended amount
- Adjust gradually based on pH balance
Lowering pH Methods
When it comes to lowering your pool’s pH levels, you have two main chemical options to choose from. Sodium bisulfate (also called dry acid) comes in powder form and is generally easier to handle. It works effectively to lower pH and poses less risk of splashing during application. Muriatic acid is a liquid solution that acts quickly and is typically more cost-effective, but requires more careful handling due to its stronger acidic properties.
Lowering Pool pH: Detailed Safety Guide
- Put on Safety Equipment
-
- Wear protective goggles, acid-resistant gloves, and closed-toe shoes to shield your body from chemical splashes.
- Prepare the Chemical Solution
-
- For Muriatic Acid:
- Fill a plastic bucket with water before adding any chemicals.
- Add water to acid in a 10:1 ratio for proper dilution.
- Never add water to acid as this can cause dangerous splashing and reactions.
- For Sodium Bisulfate:
- Fill a plastic bucket with water before adding any chemicals.
- Dissolve the powder completely to ensure even distribution.
- For Muriatic Acid:
- Turn on Pool Pump
-
- Ensure the pump is running before application to prepare for chemical circulation.
- Keep the pump running during the entire process to distribute chemicals evenly.
- Apply the Solution
-
- Start at the deep end of the pool to allow for better mixing as the solution disperses.
- Walk slowly around the pool to ensure even distribution of the chemical solution.
- Pour the diluted solution gradually to prevent concentrated areas of high acidity.
- Distribute the solution evenly across the pool water for balanced pH adjustment.
- Wait and Monitor
-
- Keep the pump running for proper circulation throughout the waiting period.
- Allow at least 6 hours before retesting to give the chemicals time to fully integrate.
- Check pH levels after the waiting period to determine if additional treatment is needed.
Dosage Guidelines
For a standard 20,000-gallon swimming pool, start with 1 pound of sodium bisulfate or 1 quart of muriatic acid to lower pH by approximately 0.2 points. Test your water before and after treatment to avoid over-correction. Space treatments at least 24 hours apart to allow proper mixing and accurate readings. Never add more than the recommended amount in a single treatment, as this can create unwanted chemical reactions and potentially damage pool surfaces.
To most easily reach the perfect balance, add pool chemicals when the sun is low and maintain proper water circulation throughout the treatment process. Always store pH-lowering chemicals in a cool, dry place away from other pool chemicals and out of reach of children and pets.
Maintenance and Prevention with Net Positive Pools
Net Positive Pools provides complete pH balance management through our weekly pool maintenance program. Our technicians test and adjust pH levels during each visit, maintaining perfect chemical balance. We use professional testing equipment and make precise pool chemical adjustments based on your pool’s specific needs. Each service includes detailed email reports of chemical levels and treatments performed.
Our certified technicians bring years of experience and specialized knowledge to create a customized maintenance plan tailored to your swimming pool’s requirements. We’ll carefully monitor total alkalinity, balance pool chemicals, clean filters, inspect pool equipment, and handle all the technical details to keep your pool water crystal clear and perfectly balanced throughout every season. With our professional service, you can forget about test strips and chemical calculations – just dive in and enjoy your pool worry-free. We offer flexible scheduling options and affordable service packages to fit any budget. Let your pool experts handle all the chemistry and maintenance hassles, contact Net Positive Pools today to set up convenient weekly service.
Resources:
https://www.jones-hamilton.com/what-is-sodium-bisulfate/
https://www.thoughtco.com/what-is-muriatic-acid-608510